iPhone Fanatic

Sunday 13 September 2009

Millcolour. iPhone's best photo processing application

Millcolour Application on the iPhone

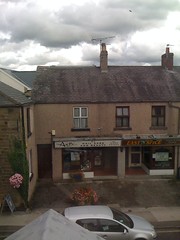
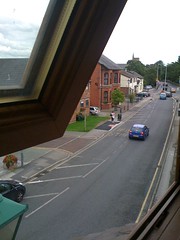
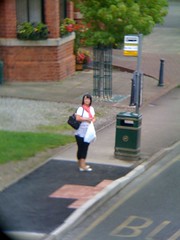
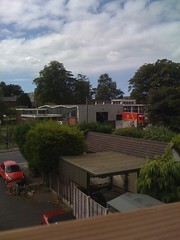
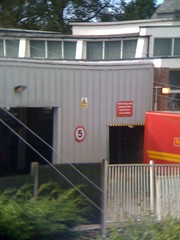
Above is just an example picture I'm using for the purposes of demonstrating this application. I took it down Blackpool seafront yesterday while I was out and about.

Millcolour is a free application that you can download for your iPhone.

Official Millcolour Flickr group: www.flickr.com/groups/1083518@N25/
Official Website: www.themill.com/colourapp/

It's not just my opinion, but a lot of others that it's one of the best applications for processing photos in phone. The fact that you don't have to pay for it is even better.

Basically you select the photo you want to process and scroll through the different types of processed film looks until you find one that you feel suits the photo. If none of them are quite right, then you can change the settings on the gain, saturation, lift and gamma all manually.

Below I have uploaded the 10 different processed looks that come with Millcolour. My personal choice is usually CROSS PROCESSED.


These are the 10 different styles of film look available on Millcolour. Don't forget you can always use the manual mode to edit too.


GOLDEN


PRINT


CROSS PROCESSED


CHOCOLATE


FILM NOIR


INSTANT


70's


MILKY


PROMO


BLEACHED


CUSTOM SETTINGS: CONTROL THE LIFT, GAMMA, GAIN & SATURATION.

Sunday 30 August 2009

Uploading iPhone photos to Flickr.

This is a great way to create your own little photo Blog on the internet. All you need is an account set up on the FLICKR website and to download FLICKIT on your iPhone.

The rest is simple:


1. So this is the screen you are greeted with when you open the FLICKIT application. You have two choices - Take a photo now or use one from your library. I am opting for using a picture that I have taken previously, so I click the picture of the flower.


2. I have lots and lots of pictures in my library. I have clicked on the picture of the bunny. See it? Flickit notifies you at the bottom that it has added the photo. I now can click DONE on the bottom right.


3. I'm back at this screen again. As you can see, my bunny is there. I need to tap on this now to set up its title and description etc.


4. As you can see, it's simple enough to understand. You can also add it to sets and add tags if you want, but I find this too time consuming and do it later when I'm on a PC.


5. If you scroll a bit further down you have privacy options. By default this is set to private. If you want people to see your pictures (of course you do) then swith it to PUBLIC. Like I have done.


6. Now finally, so it can appear on the Flickr map... You'll need to geotag it. This isn't necessary, but I like to do it when I'm out and about. I've geotagged hundreds of my pictures. It'll take a few seconds to home in on your exact location. It works a bit like a sat nav does. Now you're all done, You need to click done at the top.


7. You're back to this screen now. You're all set, so you can hit UPLOAD!


8. You'll then get the waiting screen. Depending on where you are or how fast your connection is this may take 10 seconds, to 5 minutes. I find it's usually quick. You need to make sure you don't let your phone go to standby though, because it'll cancel. Even if it does, it's not a big worry because it's all saved so you can just hit upload again.


9. And voila. It's finished. You can now visit Safari (Which is Apple's web browser) Go to m.flickr.com and find the picture that you've uploaded.

Simple!

Saturday 29 August 2009

iPhone ZOOM lens

Price: £11 inc p&p
Location: Ebay, China
Delivery date: 10 days.
GEEK: Sam Cornwell


I've been checking my postbox every day for the last two weeks, waiting for this parcel to arrive from China. Today, it did and oh boy you can imagine my excitement. Like half of the global population, I have been sucked in to the massive success of Apple and the iPhone. There's no need to justify it, as most people know somebody who owns one and raves on about how good it is all the time. Getting addons and accessories for your iPhone is just one part of that.

It's well documented that the built in camera on the iPhone is not its strongest selling point. I'd agree to a certain extent, but have still found myself using it to blog with. The fact you can upload to Flickr, Facebook or any other number of social photo sharing websites makes it invaluable in that sense.

Anyway, I need to get to the point. This lens had arrived in the post and I couldn't wait to get it out of the box.

The packaging was distinctly Chinese and well protected. It amazes me that more people don't make the most of the insanely cheap bargains you can pick up on Ebay from China. As promised on the seller's description page, the contents included a manual (which only a moron would need to look at) an acrylic iPhone case, a holding strap, a lens cleaning cloth and of course the lens. When I first heard about the ZOOM lens for the iPhone I actually thought it was a joke or some kind of parody, but looking at what I had in my hands I realised it was deadly serious.


First of all I had to attach the protective acrylic case to my iPhone. No glue, sellotape, rope or magic beans were required, it simply clicked together and held. The casing is clear, strong and a couple of millimetres thick and protects the iPhone from scratches and general wear and tear. On the back of the casing is a rather crude plastic attachment to where you would slot in the super strength ZOOM lens, this could probably be detached quite easily if you get bored of the lens and just want to make use of the case. Considering the cost of protective casing for the iPhone models, this little package is very good value indeed.

The lens is very lightweight. It's about 5cm long with a fixed diameter of around 2cm with a focus ring on the end of it. Holding the lens up to my eye acted as a mini telescope, which I dare say could be quite handy for any amateur wildlife photographers out there. There is no lens cap, but it does have a connector on it for the small strap that was included in the packaging.

So, I slotted on the lens which was incredibly easy to do and switched the camera on. It worked perfectly. I adjusted the focus ring like you would with a pair of binoculars and quickly started snapping away, producing some surprisingly sharp results which were far better than I had expected. At a guess I'd say this small piece of kit has the equivalent fixed focal range of a 400mm lens on a full frame camera. I quickly hung my head out the window and tried some before and after shots to compare.

Try to remember that we're talking about a camera phone here...


The view out of my East window. With and without the zoom lens attached


That's me, in the mirror, taking a photo of myself with the zoom lens attached in the second one. You get a good idea of how good the lens is in this one.


The view out of my Southern window. With and without zoom lens attached. Nice for spying :)


The view out of my West window, the Royal Mail sorting office.

See the 3rd picture along here of the 5 miles per hour speed limit? Well, there's a free iPhone application called FREE ZOOM that multiplies the zoom by 10x. Couple this with the analogue zoom lens and you get something like a 3000mm.

Ridiculous!


Because of the way the camera auto detects exposure levels on the iPhone 3G (The 3Gs now has what's called a tap to focus function integrated on the camera,) you'll need to steady the camera when using this lens. If you don't, you'll notice a lot of blurring and unsharp results unless you are using it on a bright sunny day. While watching the viewfinder, which is effectively the entire iPhone screen, you'll notice a lot of wobbling on straight lines and fixed angles. I found that leaning the phone on a surface or wall did the trick to steady the camera while I took the examples.

An immediate drawback was noticeable when checking out the results. There is a slight vignetting on the left, both bottom and top, on the images produced with the lens. I didn't notice this at first, but it is quite apparent if the corners are meant to be bright spots. I'd dare say that the amount or location of vignetting may be slightly varied from model to model, but considering how well everything else works it hasn't put me off in any way. The one of the thing that may be worth mentioning is that the lens isn't fixed as such when slotted on to the phone, it holds and won't fall off, but if you turn your phone upside down it'll slide right out of its slot. I don't think this is a draw back though, because nobody in their right mind would leave a lens like this fixed on it. I mean, how would you be able to put it in your pocket? Let alone it just looks plain silly.

The Verdict? Well I think it's brilliant, but I love photography and I love my iPhone. For every day use it would be a pain to carry around in your pocket, but is still a fun gadget to use. There's no doubting that the iPhone ZOOM lens borders on being a gimmick that will be fun for about five minutes then be put in a draw forever more, but for the more hardcore iPhone photographers out there it's a great tool to have. A considerable swaying point is actually the acrylic case that comes with it that doubles up as protection from wear and tear. Considering the price, I'd certainly say it's worth the money for this alone!


View my non iPhone photography here: www.archedroof.com


Followers